Friday, May 24, 2019
Card-a-mon tutorial No. 1: creating first game prototype
As I have made good progress on Card-a-mon development I think it is time to create some tutorials and see what an easy tool it is. It has learning curve but it is not very steep.
Today I will demonstrate how to create a simple game prototype.
You can watch video or read tutorial or you can do both:
First you need to go to https://cardamon.ffff.lt and create new user if you have not done that yet. Then you need to login.
Initially you will see screen that might look like this. Here you will see a list of your games if you have already created some (or nothing if you are a new user). As well you will see an option to create new game.
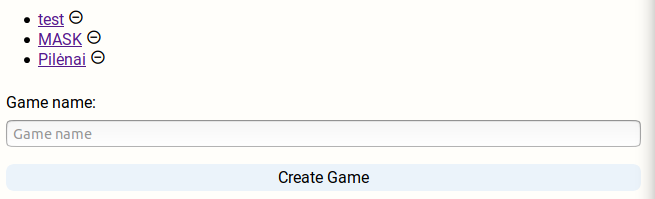
Here you can enter name of your game and click “Create Game”. Let’s say we want to create a game based on George R. R. Martin’s novel “Sandking”. This game will be about alien bugs race fighting over resources so they could create face of their god. So I have entered “Sandkings” and clicked “Create Game”. New entry appeared in the list.

Now I can click on it. Here you should see option to create Card Set. Card Set is collection of cards that share the same size and layout. It is absolutely valid to have only one set for your game but most probably you want to have several.

I have decided that I need two: “Resources” and “Actions”. I’m happy with the default Poker card size 63.5mm x 88.9mm.

Now you can choose a card set that you want to work on. Let’s start with “Resources”. You should see screen with sidebar in the left and “Add Card” button in the right.
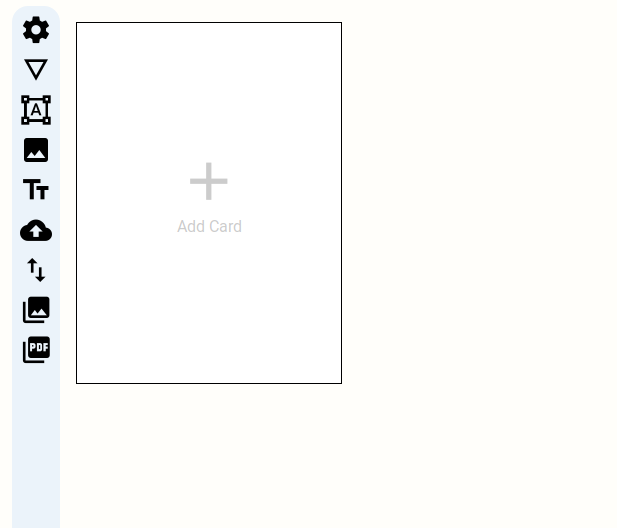
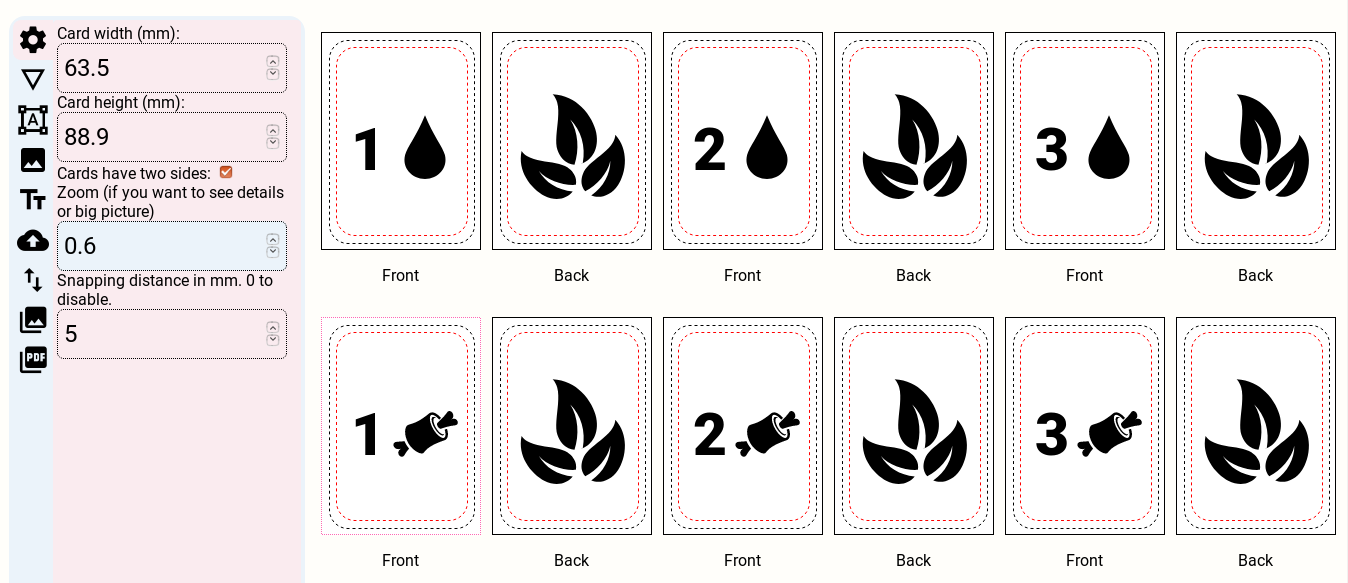
First, let’s click “Add Card” and you should have one card. Then let’s click on a gear in the left sidebar (first item). We want to have two-sided cards for this game so let’s click on “Cards have two sides” checkbox. For fun let’s increase snapping distance to “5” as well. This way it will be easier to see what happens when you move image or text fields around in the card.

Now we want to add image for back cover of our card. First try clicking on front and back of the card. You should see that selected part gets focused and outlined with dotted outline. Make sure that Back is selected and click on the forth item in the left sidebar (the one with image). Then click on “Add image field” button.
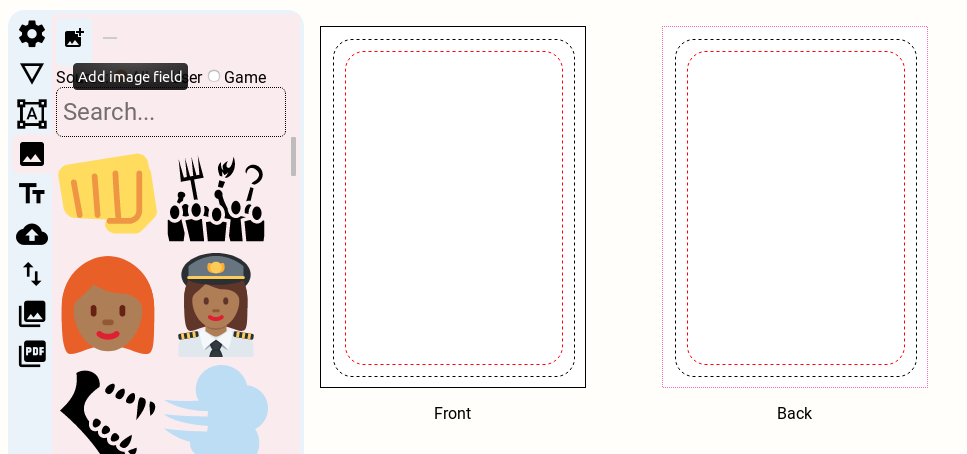
You should see an image field added to back of the card. You can drag it around using mouse. As well you can resize or rotate it. As well remember that we have set snapping to 5mm. You should see that you can place field only at points that are divisible by 5.
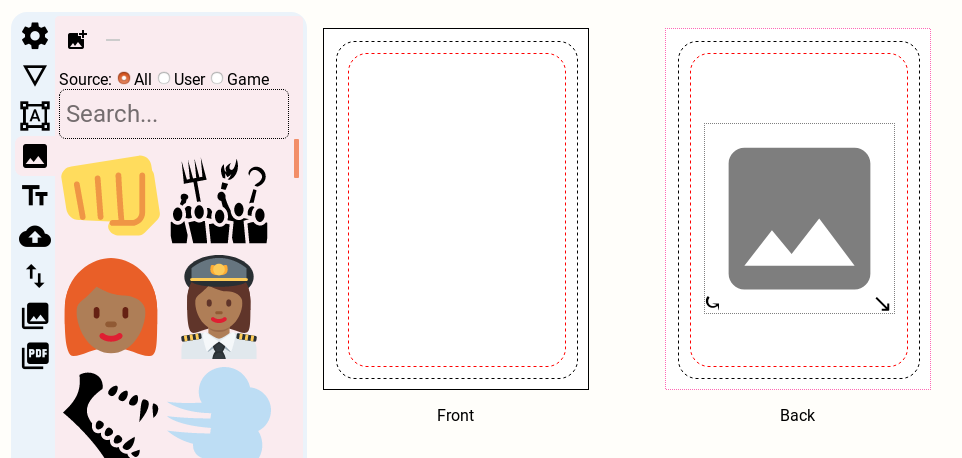
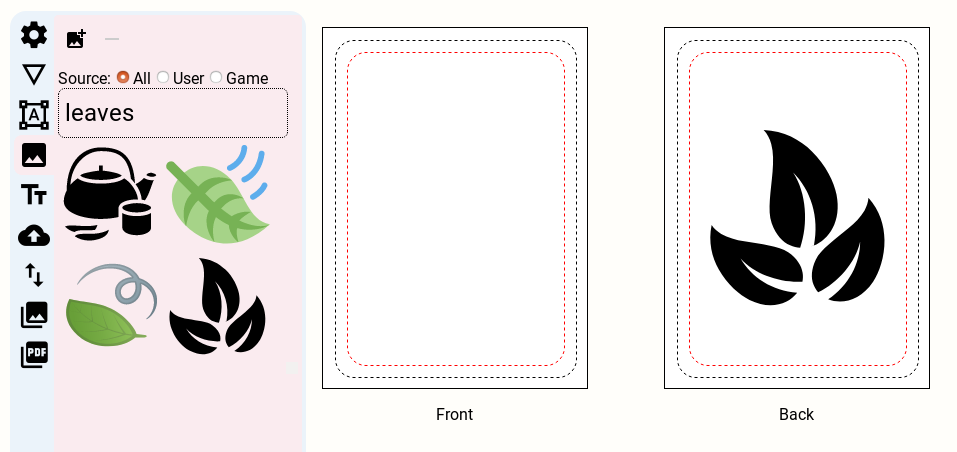
Now let’s add image to you image field. Let’s type “leaves” in “Search…” field and drag and drop image we like. In this tutorial we are using images that are available via Card-a-mon. Card-a-mon uses images from game icons, twitter and google emoticons resources. All these resources have quite permissive licenses and require only attribution. In my opinion that’s very good choice for prototypes but for final game original graphics is preferred IMHO.
Note: alternatively you can simply click on image you like in search results but make sure that you have selected image field in proper card.
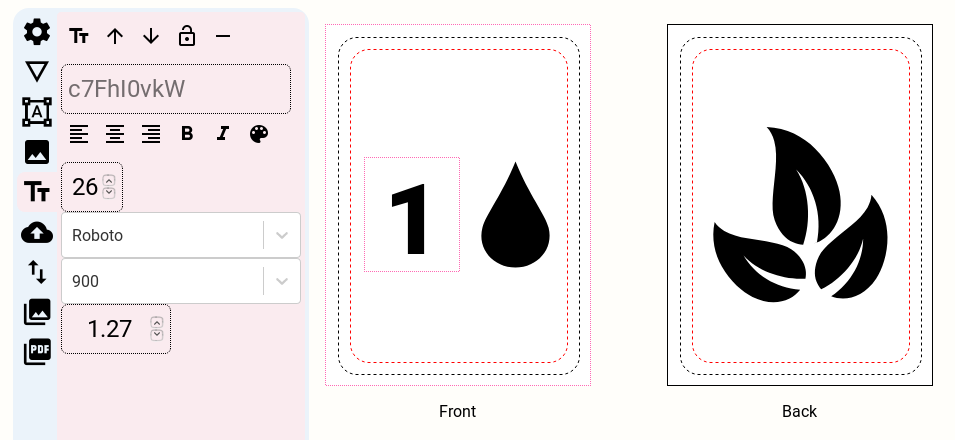
Now let’s work on front of the card. As we already now how to create image field I am leaving this task for you. As well let’s create text field. The principle is the same as with image field but now we need to use “Add text field” button from “Text” sidebar.
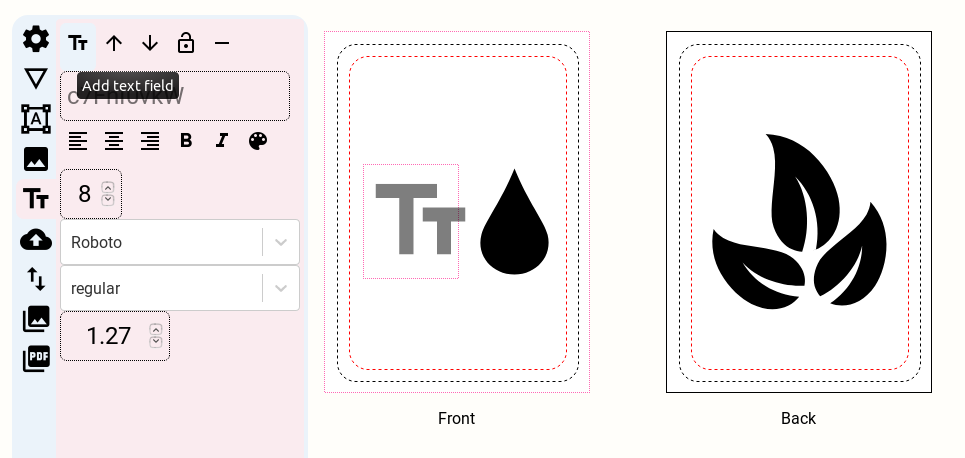
Here you can adjust your font size, family, weight, line spacing and some other parameters. Here I have played with them a little bit.
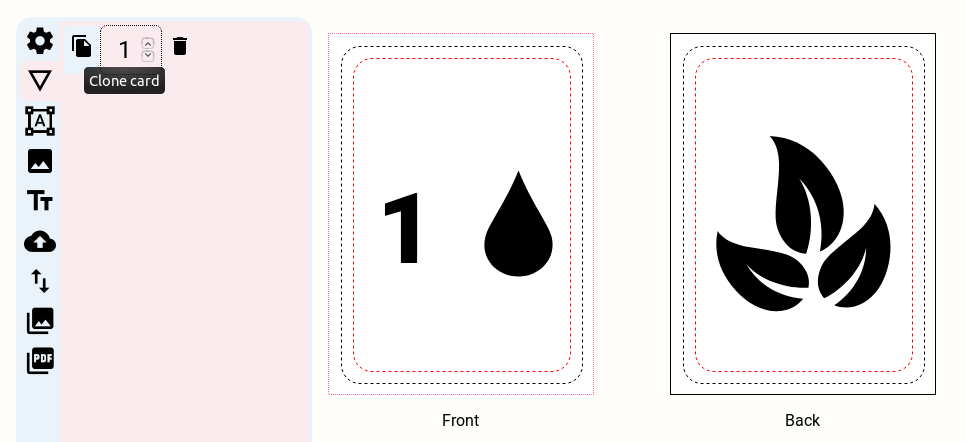
Now we want to create more cards but do it efficiently with less work. We go to “Card” sidebar item (second item in sidebar) and click on clone card. We modify cloned card to fit our needs and repeat this step as many times as we need.
Now we can return to first sidebar item and play around with “Zoom” parameter. It does not affect card size but it affects how card is represented on your screen. Here I have changed it to 0.6 so I would see bigger picture of my cards.
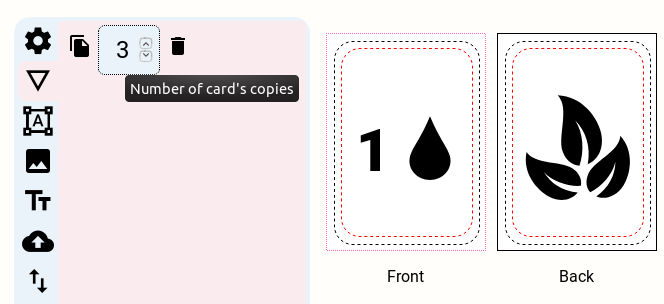
Now as we have different cards most probably we want to have more copies of some of them because they are common. So I enter “3” in text field “Number of card’s copies”.
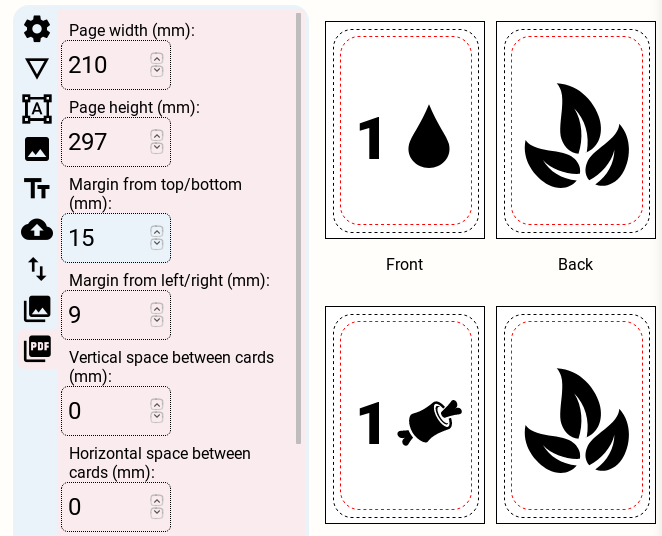
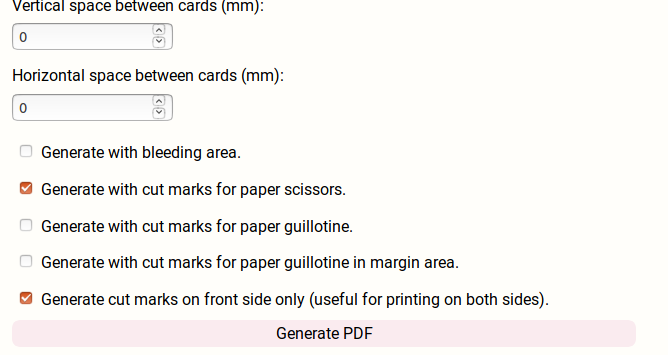
Now as “Resources” set is complete we might want to see how rendered PDF looks like. So let’s go to the last item in left sidebar named “PDF”. As for the first time you can scroll to the bottom and click “Generate” button. Now wait a little bit and you should get an option to download pdf file with your cards ready to be cut using scissors. You can play around with available settings and most probably you will get what you want.
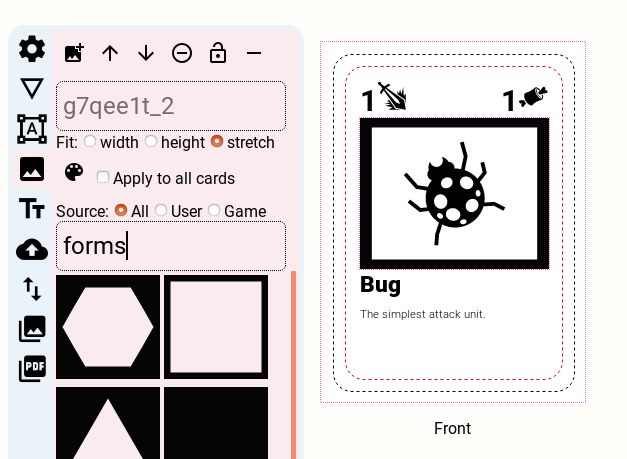
Now let’s go to another card set named “Actions”. Here I already have done some things so let’s look at what is new. In the top right corner we see text field with number and image. You might be wandering how to do that? It is very simple. Click on text field, then click on “Image” sidebar, search for image you want (e.g. “meat”) and drag-and-drop image to text field. That’s all.
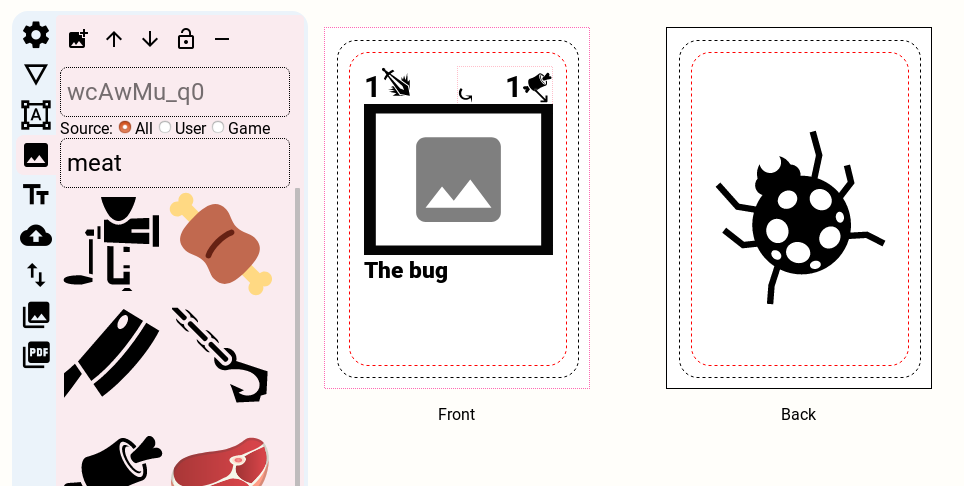
As well we see frame around our bug. If you want to achieve this then type “forms” in image search field and you will get some vector forms. Apply desired form to your image field and use Fit option “stretch” on that field. You should get simple frame.
Then create new image field on top of your form, add image you want to it and now you have a card with simple frame.
Please note that Fit’s stretch option is recommended for prototyping only. I do not recommend to use it in other situations.
Here we can continue and create more cards and then we are done generate PDF again. But most probably you want to create PDF for all your game and not single card set. In order to do that go to main game’s page where game’s card sets are listed. It is possible that you might have already noticed that PDF can be generated here as well. So again you can simply click on “Generate PDF” or play around with options and click then. After some time you will get PDF file with all your cards ready for printing.
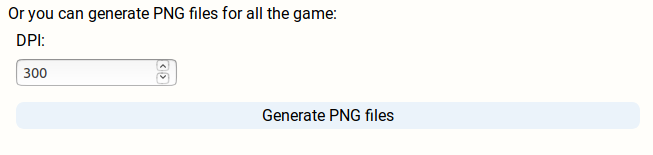
However PDF output is not always desirable result. Sometimes you need to get PNG output, e.g. if you want to print your game using The Game Crafter. In that case you need to click “Generate PNG files” button below. Again after some time you will get zip file with all your cards.
So that’s it for the first tutorial. I plan to create videos for tutorials as well. In the future tutorials I will give explanation how Card-a-mon works with your own images, more details why there are so many options for PDF generation and other details that I thing asks for explanation. At the same time I will continue improving Card-a-mon functionality so it is balancing game for me.
At the moment all Card-a-mon functionality is free and majority of it will stay this way as long as I’m alive and I can allow that myself. You should see warning in the program there I explain limitation of this free version. In the future I plan to make paid plan if there are people who will find this tool useful and free version too limiting for them.
In next tutorial we will look how to use your own images/art in your game.
Lastly, if you have comments, suggestions and etc. do not hesitate and contact me by e-mail dalius.dobravolskas@gmail.com or any other way you find appropriate for you and me.