Saturday, June 22, 2019
Card-a-mon tutorial No. 2: uploading your own images
This is second tutorial about Card-a-mon. It is recommended to check first one if you have not done that yet.
You can watch video, read tutorial or you can do both:
Possibility to create prototype using emoji ar game icons images is nice one but sometimes you want to use specific image for your card or it will not work at all if you are working on final product.
Card-a-on allows uploading and using your own images.
Little hint. You can use some public resources to get nice images:
-
https://publicdomainvectors.org/ - public domain vector images.
-
https://unsplash.com/ - free photos usually they do not even require any attribution.
-
https://thenounproject.com/ - a lot of free and not only icons.
But let’s return to Card-a-mon. Card-a-mon supports SVG, JPEG, PNG, TIFF, GIF and WEBP files (the latter 3 are converted to PNG on server).
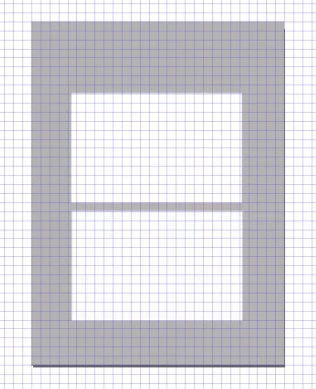
So for this tutorial I have created card’s frame. In Card-a-mon each card has 1/8 inch (or 3.125 mm) bleeds. Bleeds are commonly required by printing services like The Game Crafter and it is very likely you want to have them as well if you print on two sides. IMHO 1/8 inch side for bleeds is just historical number and in some cases smaller number would work just fine. In some situations larger number might be required, e.g. if you have extremely bad printer at home (let me know if you do). So for fun and demonstration I’m creating my card’s frame with 5 mm bleeds.
Note: I’m using Inkscape free vector drawing program in this tutorial.
That means that instead of standard poker card size 63.5 x 88.9 mm I am creating my frame of size 73.5 x 98.9 mm (+5 mm in each side). I’m doing this only to demonstrated that I can still use it Card-a-mon.

A little bit information about frame. I’m creating frame with cut out area for image and white rectangle for text. I have put red rectangle behind my frame to show that.
Next step is to upload images. You can do that using “Upload” sidebar.
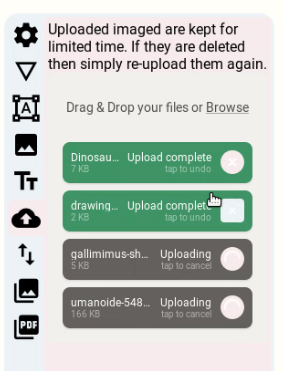
Here you see upload in progress.
Note: there are some limitation for images in Card-a-mon. All image files has 500Kb limitation. Raster files (PNG, JPEG and etc.) has max width of 960px. That’s enough for 300 DPI for poker cards if you are not zooming in and panning.
After that you need to create image field and add your frame to it.
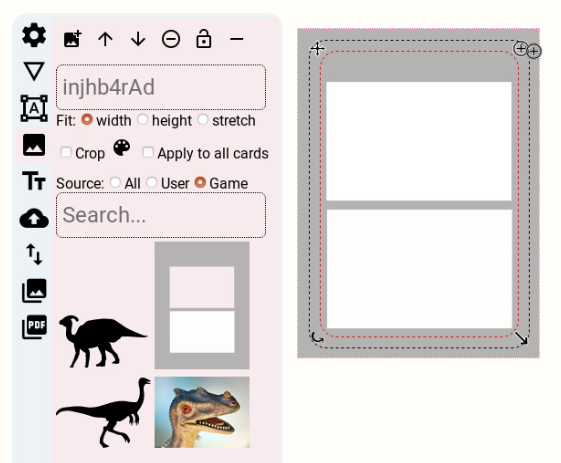
We have created our image field inside black dashed rectangle (actual card size). Since we don’t want our image to be cropped outside of image field we remove check from “Crop” check box. Next thing to do is to use zoom functionality (right top icon in image field) and make frame to extend behind image frame. We just need to adjust zoom a little bit and we are good. Depending on your image you might need to pan your image a little bit.
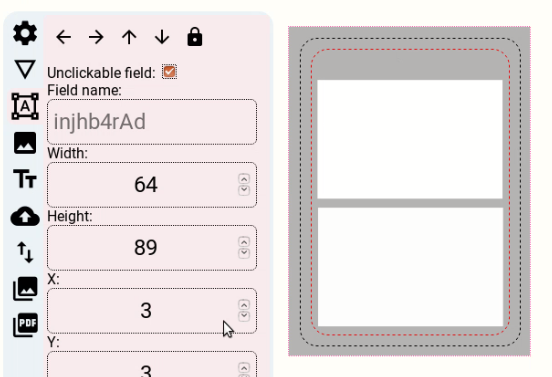
As well you might want to make this image field unclickable. It means the only way to access this image field will be via “Measurements” sidebar. The reason why you might want to make it unclickable is to have more freedom while working with other fields.

Next we want to create image field and lower it (by clicking on arrow down in “Images” sidebar). This way we ensure that our card’s frame is always drawn on top.

This way we ensure that if image extends behind space given to it will always look being inside it.
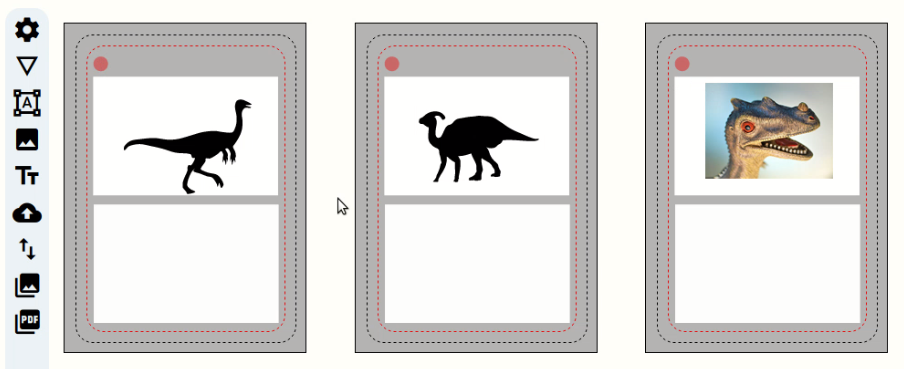
The last thing is what to do if you want to change something inside your image. E.g. we want to add red circle to our card’s frame. In order to do that all you need to do is to modify your image, upload it with the same name and reload your browser (maybe I will eliminate reload step in the future).
In next tutorial we will look how import and export functionality works.
Lastly, if you have comments, suggestions and etc. do not hesitate and contact me by e-mail dalius.dobravolskas@gmail.com or any other way you find appropriate for you and me.